Working with Groups

Working with Groups

What is a Master Group?

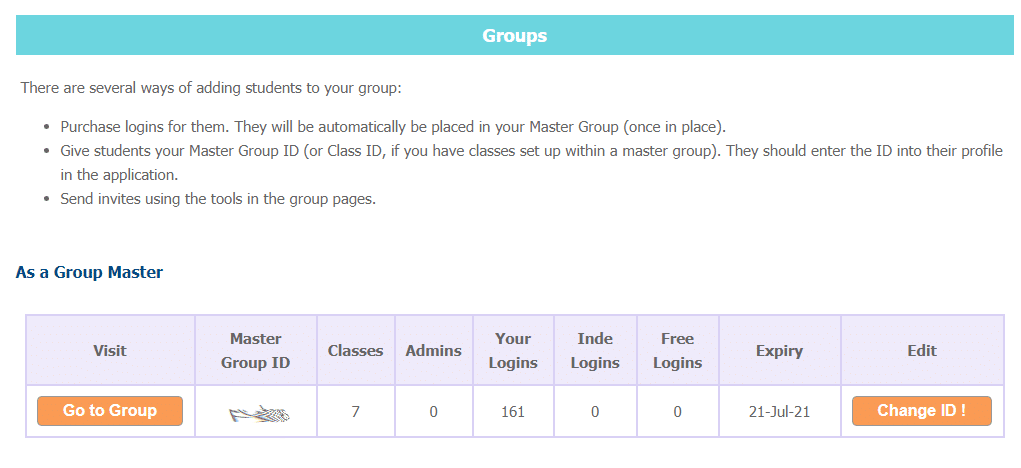
If you purchase a Teacher Login or 10+ Student Logins, you may set up a Master Group and become a Group Master.  Any logins you have purchased will automatically be placed in your Master Group.

Set up a Master Group from your Account Homepage.

If you work in more than one establishment, you may set up further Master Groups and keep all these students completely separate.  You will need to purchase another Teacher Login to create a new Master Group.

How do I find Student Login Details?

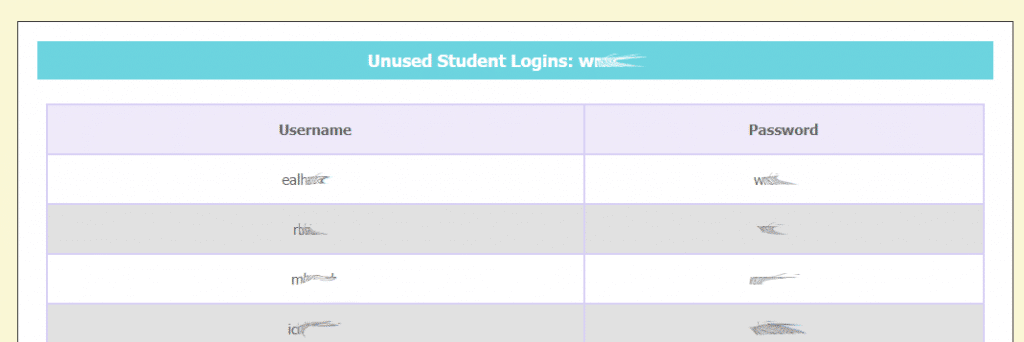
Once your Master Group is in place, you can start working with the Student Logins.  To see the list of usernames and passwords that have been created for students:

1. Click on the Members button alongside your Master Group.

2. Select the ‘List Unused Logins’ link.

3. Print or copy and paste your login information.


What is the group structure?

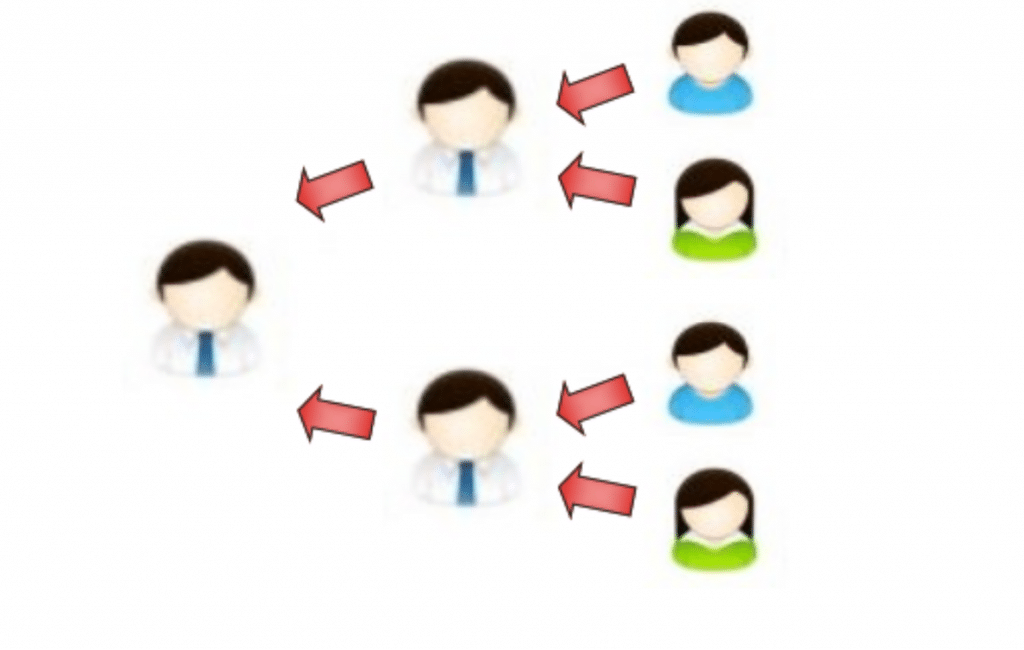
The Group Master always has control.  They can create and manage  classes and view the students in all classes.  They can also assign students to the different classes.

New classes can be created within a Master Group.  These will have their own Group ID and allow the management of only the students within that smaller group.  You may manage these different classes yourself or invite other teachers to become an administrator of a particular class.

How do I add more classes?

If you have a lot of students, you may want to set up more classes and have a few students in each.  Other teachers can then manage their own classes (or you can manage them yourself).

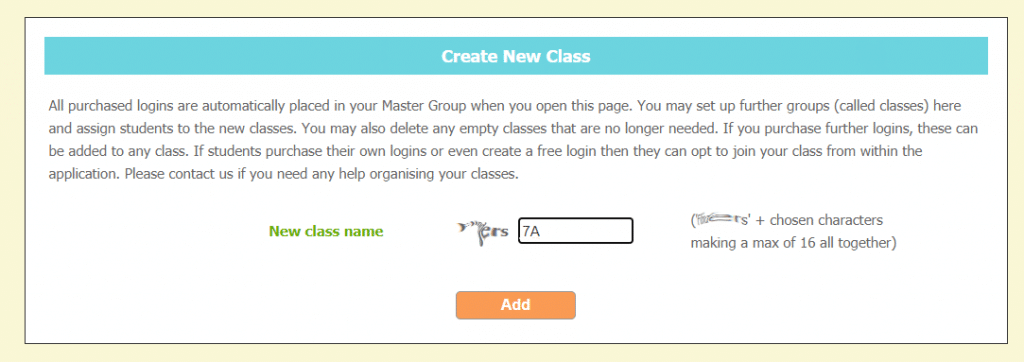
To create a new class, log in to the console and click ‘Go to Group’ alongside a Master Group you have created.  The ‘Create New Class’ form can be found on the Group Homepage.

Where are the new classes displayed?

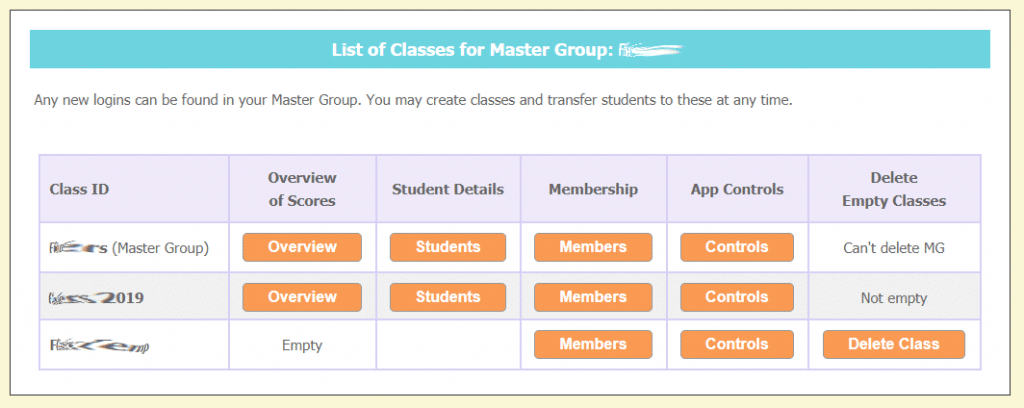
When you create a new class it will be placed in your list of classes, below your Master Group.  The new class will be empty until you assign students to it. Only an empty class can be deleted.  A class will be made empty if you move all the students out of it.

How do I assign students to a class?

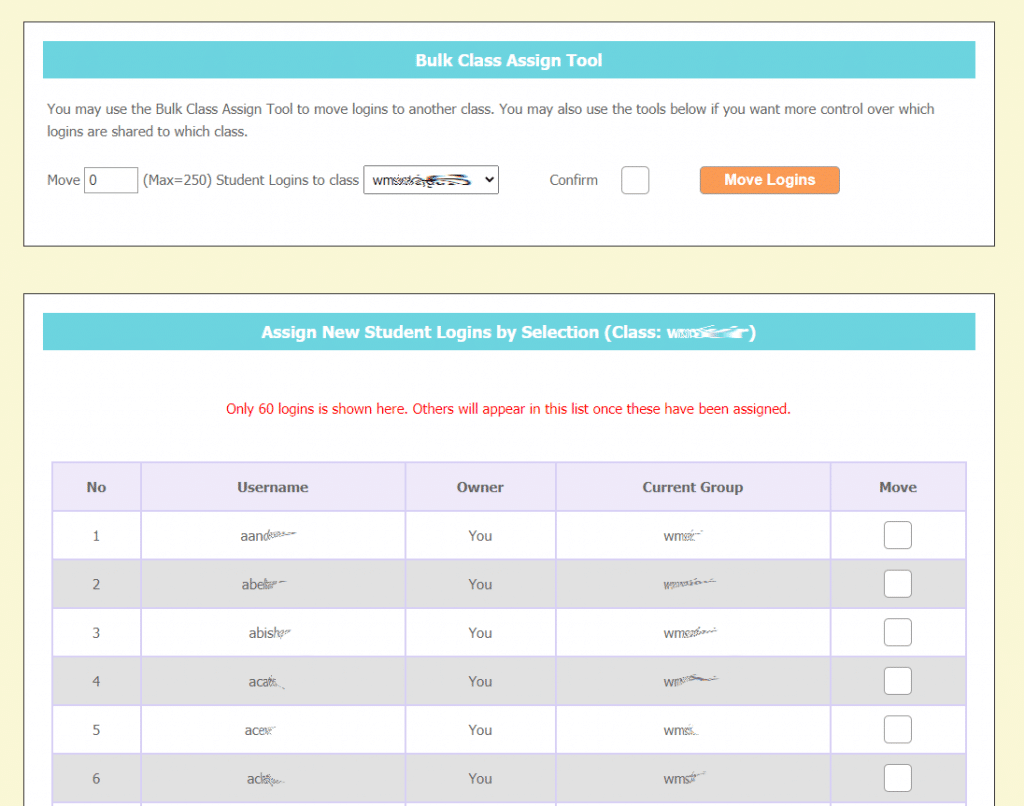
To move students from your Master Group into another class, click on the Members button alongside your Master Group.  You then have two choices:
 
1.  If you are moving a lot of new users, use the Bulk Class Assign Tool.  Simply type the number of Logins you want to move and select the target class from the list.  We will move Logins from the start of your list (as they are displayed below).
 
2.  If you want to control exactly which Logins are moved (for example, if you have already changed the Usernames and need to place specific students in classes) then use the tools further down the page.
 
Note: Only the owner of the logins or a group administrator can move students out of their classes.  Other teachers cannot pull students into a class.

Can I give logins to another user?

Yes. It may be the case that you have purchased logins for different schools or businesses and want to actually pass ownership of these to the schools themselves.  This way, they can then set up groups and classes for their own students and teachers.  To pass ownership:
 
1.  Click on the Members button alongside the class containing the unused logins you want to share.
 
2.  Click on the ‘Pass Ownership’ link.
 
3. Use the tool to initiate the transfer of ownership.
 
In order to prevent mistakes, this is a 3-step process.  The recipient will be sent an invitation to accept the logins, which they must do so in their account (which they set up, if necessary).  You will then receive a notification and, if you are happy that the logins have been sent to the right person, return to this page to confirm the transfer.  Once this last step has been taken, you cannot retrieve the logins (although the recipient can pass ownership back to you).

Note:  Once you have passed ownership of a login over to another person, you will have no access to it.

How do I add administrators to a class?

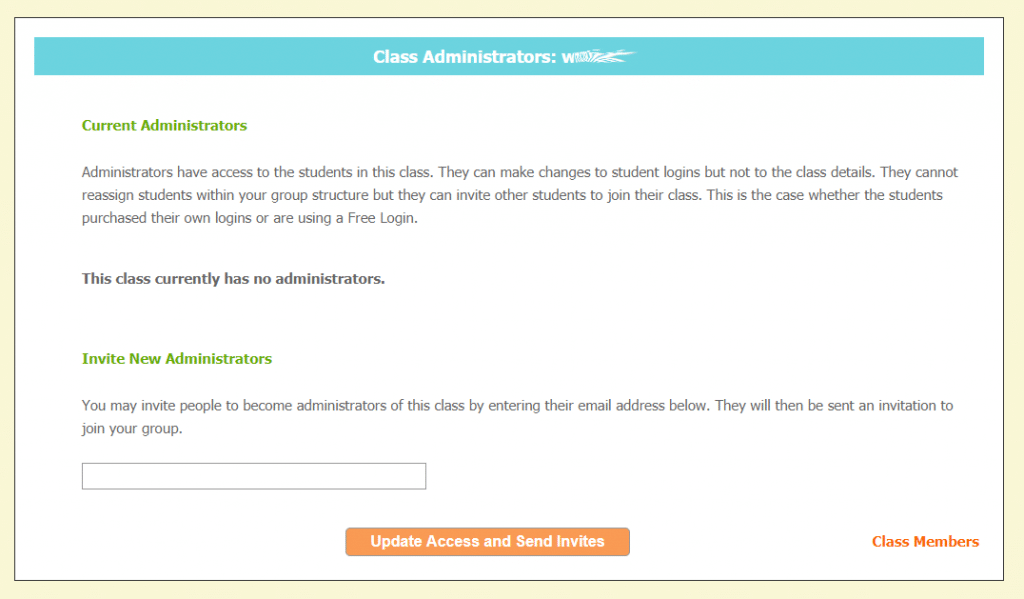
Anyone with a free Console Account can become a Class Administrator.
 
Visit the Group Homepage, click on the Members button alongside your chosen class then click ‘Administrators’.  You may then invite someone to become an administrator by adding their email address to the lower box and updating.
 
The person will receive an email inviting them into your group.  If they already have a Console Account, then the invitation will be shown on their Account Homepage.  If they haven’t an account, then they will need to set one up using the same email address you used to invite them.

Can I send Login details home to parents?

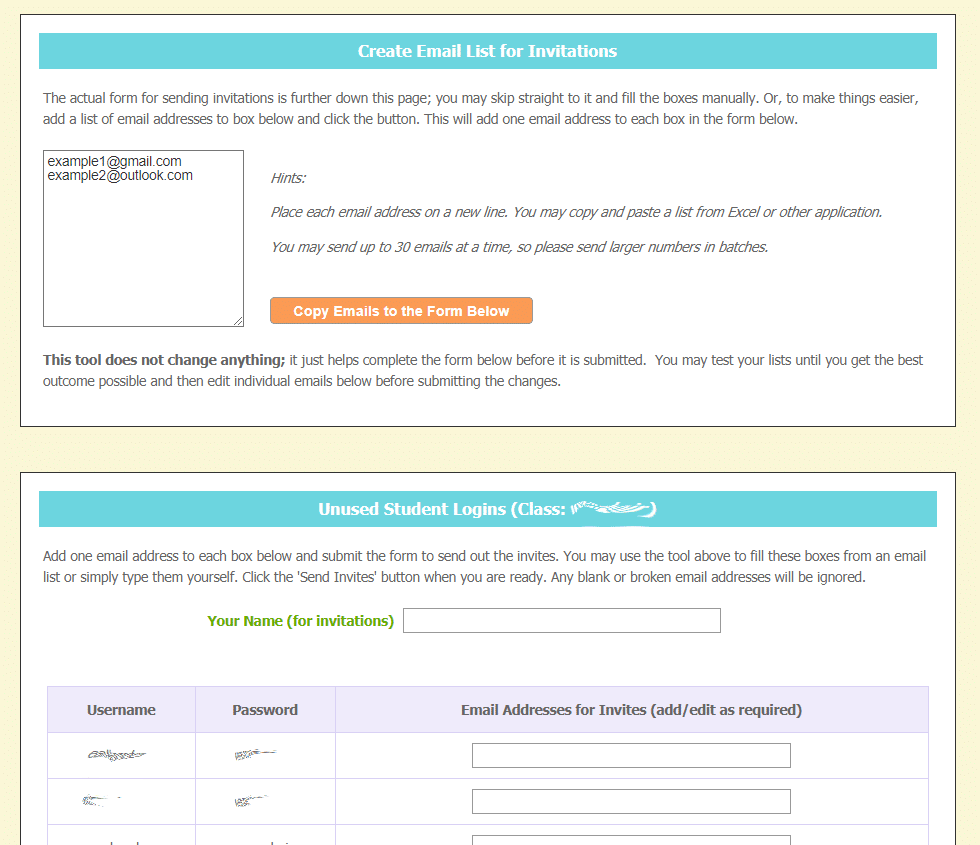
Yes – we provide a tool that sends a Username and Password to each email address in your list.
 
1. Click on the Members button alongside your chosen class and select the ‘Send Details Home’ link.
 
2. How you proceed depends on the number of usernames you are sending.  The aim is to complete the bottom form shown on the right and submit it.  You may simply type email addresses in the boxes, although this will be a tedious task if you have a lot of login information to share.  If you have lists of email addresses elsewhere (e.g. in a spreadsheet) then continue as below.
 
3.  The top tool on the page allows you to copy a list of email addresses into the form below.  Paste a list of email addresses into the box and click the button.  The tool will check that each address is of the correct format and copy it to the form below,
 
Ask us for help if you have any problems with this process.  We are always happy to help.

Can I change Usernames and Passwords?

Yes.  Although you can change these details for individual students using the single student details page, you may also change these in bulk.
 
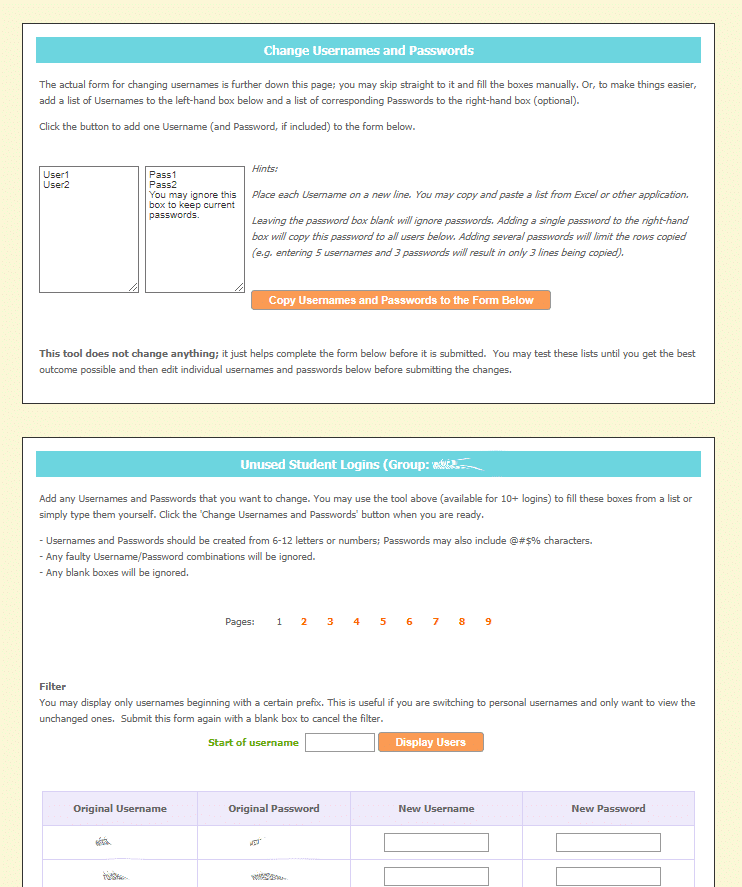
1. Click on the Members button alongside your chosen class and select the ‘Change Usernames’ link.
 
2. How you proceed depends on the number of usernames you are changing.  The aim is to complete the bottom form shown on the right and submit it.  You may simply type new usernames and passwords in the boxes, although this will be a tedious task if you have a lot of data to change.  If you have lists of usernames and passwords elsewhere (e.g. in a spreadsheet) then continue as below.
 
3.  The top tool on the page allows you to copy lists of usernames and passwords into the form below.  The usernames list is straightforward. The passwords box has a few options:
 
– Leave it blank if you want to leave the passwords as they are;
– Type in one single password if you want to make all the passwords the same;
– Paste in a list of passwords.
 
If you paste a list of passwords, then the tool will try and match one password to each username.  If you are short on passwords, then some of the usernames will be ignored (and vice versa).
 
Note that this tool does not change anything in our database; you are simply using it to complete the bottom form.  You can repeat this process as many times as needed to get the best results before finally checking, editing and submitting the bottom form.
 
4. Once you have changed some usernames, you may find that these are then listed first.  This makes the top tool harder to apply to the usernames you want to change subsequently.  To improve this situation, use the filter box to decide which usernames to display.  For example, if your usernames were originally Johns001, Johns002, Johns003 etc., then enter ‘Johns’ in the filter first so that you are only displaying unchanged usernames.  You can then return to the Bulk tool and populate the form.
 
Ask us for help if you have any problems with this process.  We can usually sort out your data fairly quickly

Can other students join my group?

Yes – any students purchasing their own logins or using Free Logins can join your group.  You will need to share a Group ID with them.  Remember that if you haven’t created any classes, then this will be your Master Group ID.

Students should do the following:

1.  Log into the application.
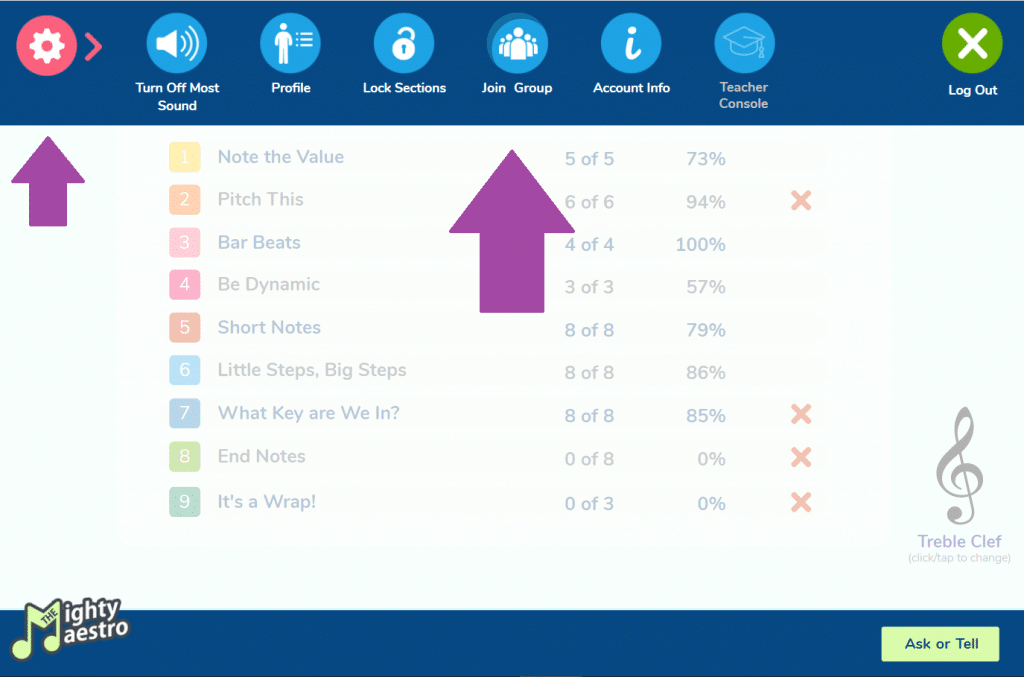
2.  Click on the user menu icon in the top left of the screen.
3.  Select Join Group.
4.  Enter the Group ID you have given them.

Can those with free logins join my group?

Yes – any students can join your group, even those with free logins.  Click on Join Group in the menu within the application and enter the Group ID. See our Groups of Free Logins page for more details.

Your privacy

We use cookies to keep you logged into the activities and improve your experience of our website.

A few more details...
We collect just enough information to run the activities and check that the site is working as intended. Students may remain anonymous with the use of generated IDs. Please see our Privacy Policy for more information and talk to us if you have any concerns.